
Ahh, yes the long awaited post about the bees. I'm so sorry I didn't get to this last week, but my life has been on the edge of crazy for the last five days (more like the last five years, but who's counting). Two sick kiddos, a working and in school husband = long days and nights with little rest. This means that the things I love doing often get neglected, like blogging for instance. And speaking of busy, wow! I think I will learn a lesson or two from these amazing bees who I have the privilege of keeping on my property. These ladies are beyond busy, they are highly motived and I've NEVER seen a group made up of mostly females who get so much done with so little drama.
So as a recap, we picked up the bees a week ago. On the night we picked them up from the local bee keeper, I laid my ear against the closed hive and I could hear the humming of thousands upon thousands of bees. The thrill of their energy and of the journey that I was getting ready to embark upon gave me such a kick of joy. It was awesome. They survived the 1 hour drive back home and we set them up on cinder blocks (two high) and removed the wire mesh which was placed over the entrance, gating them all in for the ride. Amazingly, not one bee came out once the mesh was removed.
The next morning I ventured out in the morning to see the action. Sure enough, there they were awake and on their way diligently doing their job. The pattern and rhythms of bees, like so many wild creatures is based upon the sun light. When the sun is up, so are they.
The Ground Work

Below I'm going to detail the necessary preparations that had to be done in order to welcome this army of working women.
SUGAR, SUGAR, SUGAR

Something that I didn't realize when I first started my research on bee keeping is the unbelievable amount of sugar that is required in the process. I honestly believed that bees could find their own food without any help at all. And this is true, obviously because wild bees seem to do just fine. But in order to keep your bees around, feeding them a solid mixture of sugar and water is a must.
The recipe for sugar water is pretty simple, however like with most simple concepts we have muddled it enough to make it seem a little complicated. Most of the books will explain that the sugar to water ratio is 1:1 and they would be correct. BUT it is not a 1:1 based upon quantity, but upon WEIGHT. So, for a gallon of water which is approximately 8lbs one must add 8lbs of sugar. That is a lot of sugar, so go to Costco and bulk up on your sugar rations. An easy recipe is as follows:
1 Five Pound Bag Sugar
2.5 Quarts of Warm Water
Dissolve the sugar into the warm water, do not boil!!
I made up quite a bit and have a back-up quart ready to go when I need it.


My Sugar Storage. On the right you'll see the entry feeder. This contraption slides up under the entryway and the bees can feed directly from the drippy syrup dispensed through the dotted holes on the lid of the mason jar.
TEST YOUR EQUIPMENT
Yep, you heard me right. Get out there and light your smoker, try on your hat, put on your veil, and work a little with your gloves. I used a couple different fuels for the smoker. First, I used pine needles. These created a beautiful and thick white smoke and quickly, but I could tell that I would have to keep adding more needles as they burned fairly quickly. I also used Pet Bedding, which I found fairly cheaply at Lowes in their dog house section of the store - and it's a huge bag, so it'll last forever probably. The finely shaved pieces of cedar were a little more difficult to start the smoker with, but once I was able to get the heat going the smoke was white, thick, cool, and best of all long lasting.


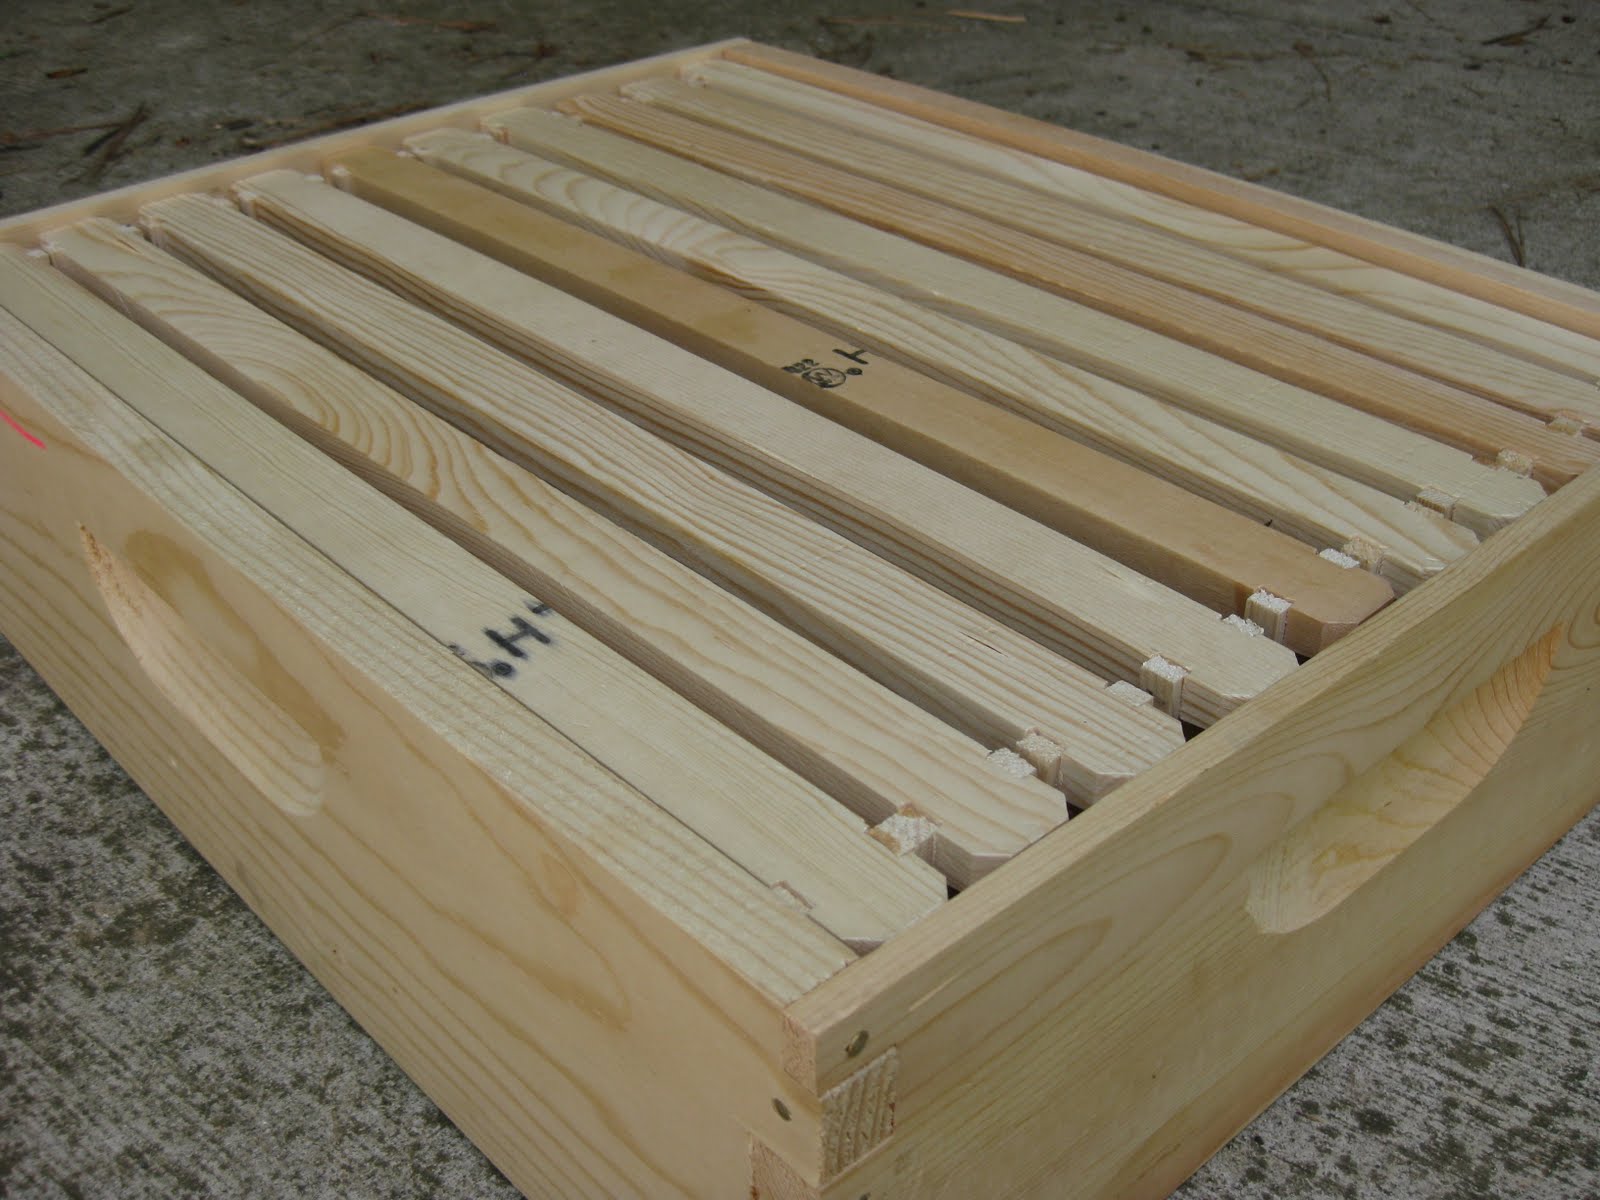
BUILD YOUR SUPER
Being the novice bee keeper that I am, I was unaware of how soon I would need my super. Turns out my assumptions were pretty badly off. Now, as to the exact time we will add the honey super that depends 100% on the bees themselves, each hive has its own personality. But when I learned that it could be a week to three weeks, we got busy building. My husband is a carpenter and LOVES to do wood working. So, when I mentioned that we needed to put this together, his eyes lit up. There are plenty of places to find plans to build your own super, but for the sake of time and sanity we opted to buy the materials already measured out. He spent about an hour putting it together (and that was with the "help" of our two-year-olds). I highly recommend you start with a kit and learn to put these together, you'll save money and you'll have a greater investment of yourself in this hive. We opted for the Shallow version of the super, the comb itself is about 4 3/4 inches deep. You can go with a medium or deep super, however be prepared to put your back into lifting! When filled with honey, the frames can be quite heavy.

Piecing the box together


One of the 10 frames for our Shallow Super

Duragilt Foundation going inside each frame.
These are thin sheets of embossed, bees wax coated foundation. The scent of the bees wax gives the bees an incentive to start building, they feel right at home.


Securing the foundation into the frame.


The Work Piling Up

The Beginning

The Middle

The End
With everything in place and ready to be used, the only real action we can take is to wait - and believe me, waiting is an action! So we gave the bees about five days to settle into their new location before we opened the hive. I'll be posting the results of our first opening soon!


2 comments:
Love that you are documenting this!! SO excited to see the rest. That is crazy about the sugar! Good job!
I can't wait to taste some of your honey. I will trade you some chicken eggs!!!
Post a Comment